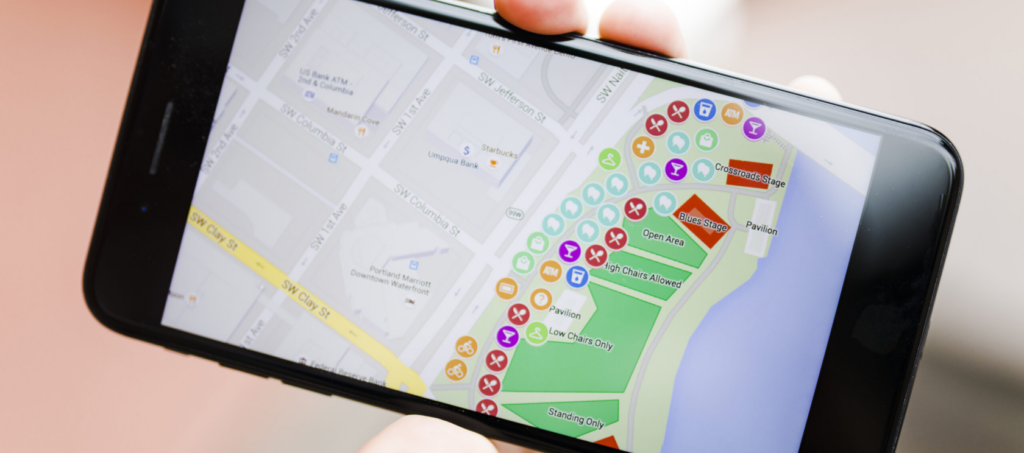
Indoor maps are no longer optional – they’re becoming part of the core infrastructure in modern buildings. Shoppers expect to find their way around a mall as easily as they do on Google Maps. Hospitals want faster patient routing. Airports need smoother passenger flow. And warehouses demand smarter tools for tracking assets in real time.
The indoor positioning and navigation market has been growing steadily and according to the NMSC’s research is projected to exceed $30B by 2030, driven by demand for real-time location systems (RTLS), indoor navigation apps, and smart facility management. Giants like Google, Apple, and HERE have already invested heavily in digital indoor mapping formats and toolkits. All this contributes to effective indoor wayfinding and facility management.
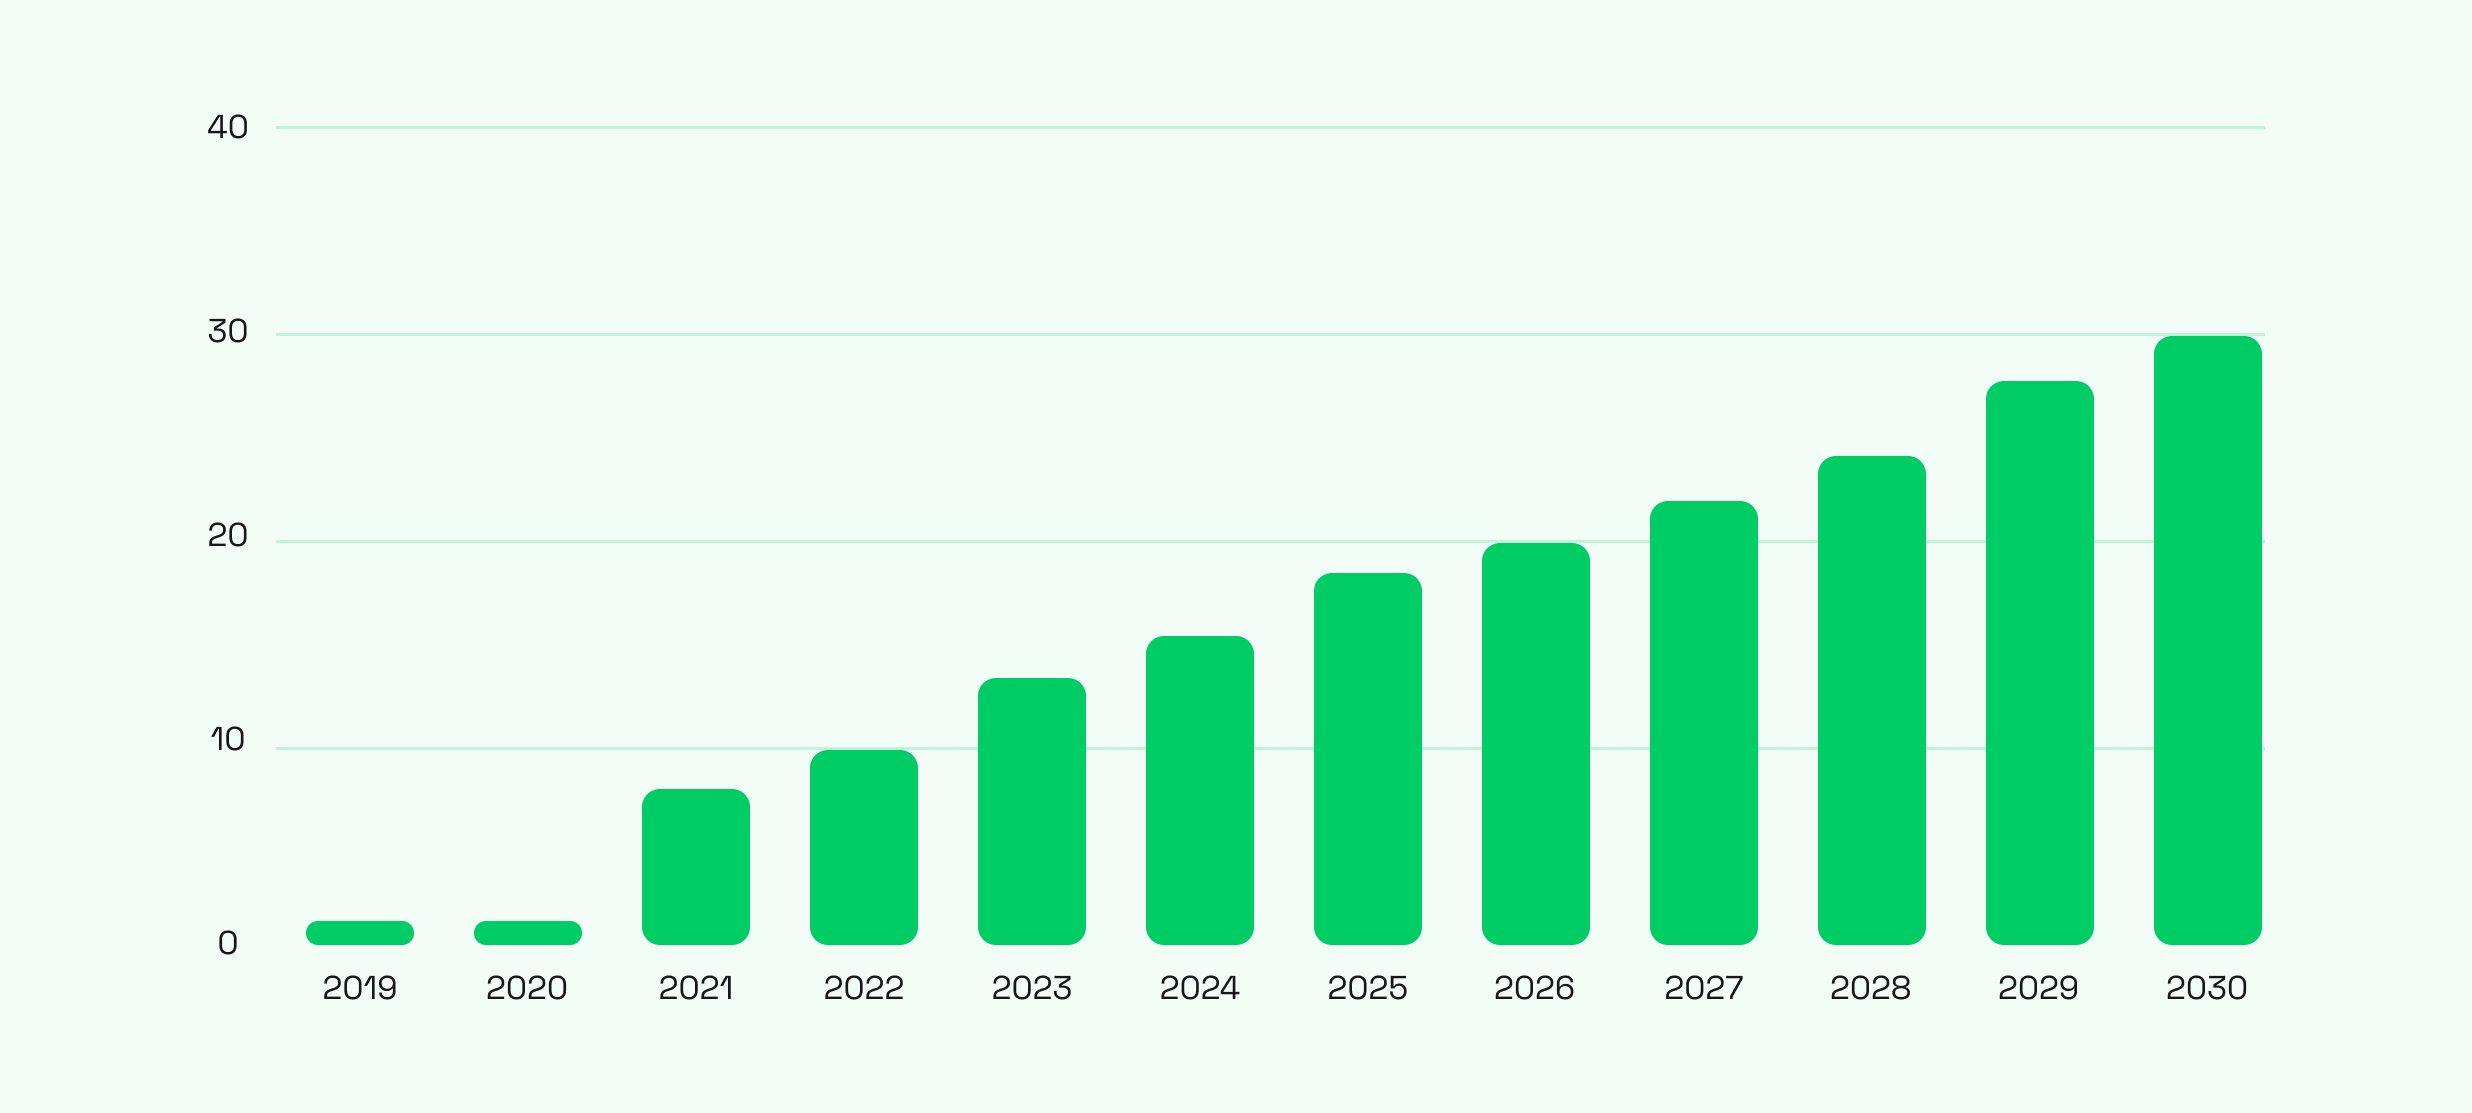
Image source: Indoor Positioning and Indoor Navigation Market Size by NMSC
But for most companies, the gap isn’t technology, it’s knowing how to actually start. That’s why this guide focuses on what most articles skip: the real-world steps, trade-offs, and practical decisions behind building an indoor map that works – from digitizing floor plans to integrating metadata and supporting live positioning.
At Volpis, we specialize in indoor mapping and help companies turn complex spaces into seamless digital experiences. In this guide, we’ll explore how to make a map of a building and share the real-world steps, trade-offs, indoor mapping tools, as well as practical decisions behind building an indoor map, from digitizing floor plans to enabling live positioning.
This guide is for CTOs, Product Managers, and Operations Leads building indoor navigation or location-aware systems. Whether you’re launching a new mobile or web app, digitizing a venue, or need to create indoor maps to optimize a warehouse, you’ll find a practical framework rooted in real-world experience, not theory.
What is indoor mapping and how is it different from outdoor?
Indoor mapping is the process of turning raw architectural data – floor plans, CAD drawings, or 3D scans – into structured digital maps that can function either as informational resources (e.g., directories, emergency plans) or as a foundation for advanced applications like indoor location tracking, navigation, and smart facility management.
An indoor map is a digital representation of a building’s internal layout – including walls, rooms, corridors, stairs, elevators, and key points of interest (POIs) like shops, gates, restrooms, or equipment.
Unlike outdoor maps, which focus on roads, cities, and terrain, indoor maps focus on the micro-level structure and semantics of indoor environments where GPS signals often don’t reach.
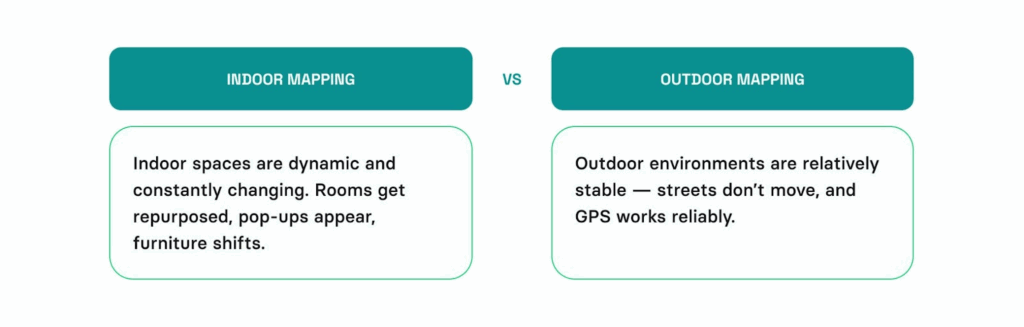
The difference between indoor and outdoor maps goes far beyond scale. Outdoor environments are relatively stable – streets don’t move, and GPS works reliably. Indoor spaces are dynamic and constantly changing.
Rooms get repurposed, pop-ups appear, furniture shifts. In places like airports, a corridor might be temporarily blocked, or an elevator could be out of service, instantly affecting navigation. And GPS? It doesn’t work indoors.
That’s why indoor maps need to be far more precise, regularly updated, and integrated with technologies like BLE beacons, Wi-Fi RTT, or AR anchors to support real-time location and guidance.
Using Google Maps for indoor mapping: what you can (and can not) do

Indoor navigation is no longer just for airports and malls, businesses of all sizes are exploring ways to digitize their spaces and develop indoor mapping systems. Google Maps often seems like the obvious starting point.
But what can you actually do with Google indoor maps? And where do they fall short? Let’s break it down.
What Google offers
Google has supported indoor mapping since 2011, but only for selected public venues like airports, malls, museums, and transit stations. In these locations, users can view floor plans, switch between levels using a built-in selector, and see indoor POIs such as gates, restrooms, or stores. Here are some examples of Google Maps indoor maps:
- Los Angeles International Airport (LAX)
- Dubai Mall
- Mall of America, Minnesota
- Grand Central Terminal, New York
- Madison Square Garden, New York
At Madison Square Garden, simply zoom into the venue in Google Maps to reveal the indoor floor plan and a compact floor selector (e.g., concourse vs. suites). As you switch floors, POI labels update – concessions, restrooms, gates – so visitors can quickly understand what’s available on each level.
Note that indoor details render only on the standard map style – if you’re on Satellite or another layer, the floor picker may not appear even when fully zoomed, so switch the Layers control back to Default.
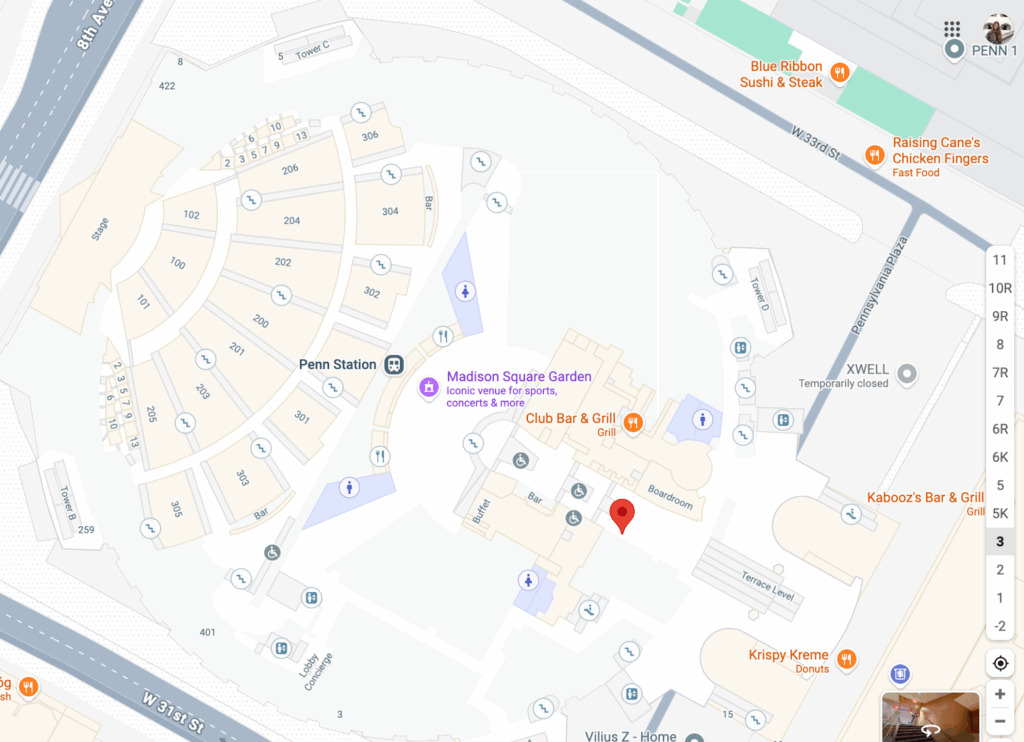
Image source: New York Madison Square Garden in Google Maps
Positioning relies on a combination of GPS, Wi-Fi, cell networks, and on-device sensors to deliver a rough user’s location. It works, but only in places Google has mapped and approved.
Can you add your building to Google Maps?
If you manage a venue like a shopping mall or stadium, you can submit floor plans to Google for possible inclusion. But the process has strict requirements:
- Correct formats (PDF, image, IMDF, etc.).
- Accurate georeferencing.
- Verified usage rights.
Once approved, your digital indoor map becomes visible to Google Maps users – but you won’t control how it’s rendered, updated, or integrated with your apps.
This is useful for high-traffic public spaces. For private venues, custom logic, or integration needs – it won’t be enough.
Understanding Google Maps API costs
Google indoor maps, when used for businesses to showcase their venue, don’t typically have a direct cost. However, if you’re looking to leverage additional features or integrate indoor maps into a web or mobile device application, costs may arise from accessing the APIs.
Google does offer a free tier for its Maps API, but there are important limits to consider. The free limit varies based on the specific API in use and changes over time. Google provides a certain number of free requests per month, after which billing starts.
It’s extremely important to monitor usage closely to avoid unexpected costs, especially when implementing custom indoor mapping solutions that may generate numerous API calls. Always consult Google’s official documentation to get the most up-to-date details.
Building your own indoor map with Google Maps SDK
If your location isn’t covered by Google Indoor Maps, or you need full control over functionality and branding, you can integrate your own digital indoor maps using the Google Maps SDK. Depending on the size and complexity of your venue, there are two main approaches:
1. Simple Indoor Maps with Ground Overlays
- Use Case: Works best for small venues or single floors.
- How It Works:
- Overlay a single image of your floor plan (PNG/JPEG) directly on top of the base map.
- Position and scale it to align with the building footprint.
- Implementation:
- Android: GroundOverlay
- iOS: GMSGroundOverlay
- Web: GroundOverlay in the Maps JavaScript API
- Limitations:
- Only suitable for small areas.
- No zoom-level detail (the image gets blurry when zooming in).
- Difficult to update or manage for multi-level or large buildings.
From years of implementing Ground Overlays in production, our rule is: on mobile (Google Maps SDK), keep them for small footprints – one building or roughly a 2048×2048 px image per floor- for quick, accurate placement. For larger venues or multi-building campuses, quality and performance degrade (memory pressure, scaling blur, slow loads). In such cases, it’s better to use tile overlays (GMSURLTileLayer or a custom tile layer), which allow partial loading, efficient caching, and smooth zooming across large areas.
2. Scalable Indoor Maps with Tiles
- Use Case: Best for larger venues, multi-floor buildings, or when higher precision and scalability are needed.
- How It Works:
- Break the floor plan into a set of map tiles (like Google’s own base maps).
- Tiles are loaded dynamically as the user pans and zooms.
- Implementation:
- Android: TileOverlay with a custom UrlTileProvider.
- iOS: GMSTileLayer.
- Web: TileLayer in the Maps JavaScript API.
- Tile Hosting Options:
- Server-hosted: easy to update without app releases.
- Locally bundled: allows offline usage.
- Advantages:
- Efficient handling of large areas.
- Supports multiple zoom levels with clear detail.
- More professional and maintainable solution compared to a single overlay.
For most businesses, Google Maps Indoor is either unavailable or too limited to support real navigation, positioning, or operational use. If you need full control over design, data, routing, and user experience, you’ll need to build a custom indoor mapping system that manages floor plans, positioning, and navigation independently of Google Maps.
Based on our experience developing indoor maps for airports, we’ve learned one important thing: when working with Google Maps Tiles, it’s crucial to ensure that all heavy operations – such as cropping floor plan images – are handled on the backend. Offloading these tasks from the device to the server can significantly reduce the strain on the application and the device itself. In large locations, on-device processing has even led to crashes due to excessive CPU usage.
By moving image processing to the backend, app load times can decrease by up to 80%. Additionally, implementing caching mechanisms for future app launches can further improve performance and deliver a smoother user experience.
Core types of indoor maps
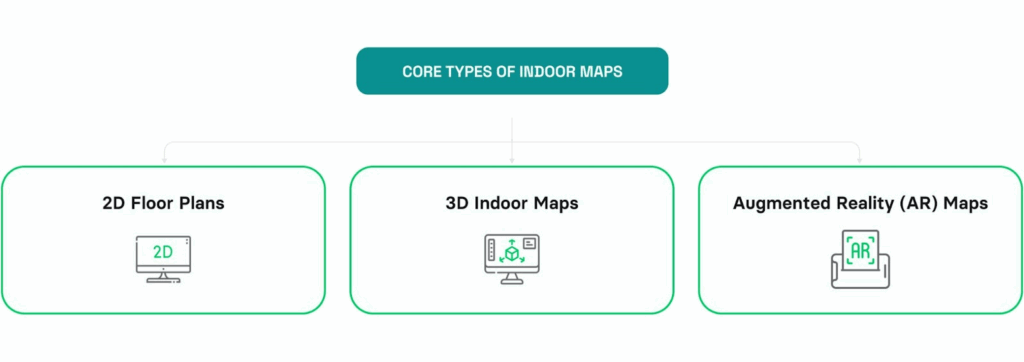
Before you get into navigation, positioning systems, or AR overlays, you need to decide what type of indoor map you’re actually building. The map format you choose defines everything: how it’s designed, how it’s maintained, and what features can be layered on top.
Let’s break down the core types of indoor maps, from simple floor plans to immersive interfaces.
1. 2D floor plans
A 2D indoor map is a flat representation of the space – showing rooms, walls, corridors, staircases, and exits on a single plane. They usually come from architectural drawings or CAD exports and include labels like “Reception,” “Cafeteria,” or “Emergency Exit.”
Example: The wall directories in an office lobby or hospital entrance. They don’t show depth, but they provide a quick orientation of where you are and what path to take.
Could fit in:
- Emergency signage and evacuation routes.
- Wall-mounted directories in public buildings.
- As a simple reference layer for early-stage mapping projects.
2. 3D indoor maps
3D indoor mapping adds vertical and spatial context to a building model. Such maps are created with LiDAR scans, photogrammetry, or manual modeling, and help people understand how different floors and open spaces connect.
Example: Airport navigation apps that show escalators, gates, and lounges in 3D. This reduces confusion for travelers moving across multiple levels.
Could fit in:
- Large, complex venues like airports, malls, or convention centers.
- Smart buildings that integrate systems like HVAC, lighting, or security.
- Real estate marketing and digital twins, where immersive visuals matter.
3. Augmented Reality (AR) maps
AR maps overlay navigation cues on your phone’s live camera view. Instead of interpreting a map, users follow arrows or labels anchored to real-world spaces.
Example: An airport app that guides passengers from check-in to security and on to their gate with clear, on-camera overlays. Airports are one of the most impactful AR use cases – see our guide on implementing AR indoor navigation at airports.
Could fit in:
- Shopping malls guiding visitors to specific stores.
- Corporate campuses with multiple connected buildings.
- Airports and hospitals, where reducing stress is critical.
Customization of indoor maps
Any of these map types can be customized – not just visually, but strategically. That means aligning your map with your brand, your operations, and your users’ real-world goals.
- In retail stores, that might mean showing product zones or promotional areas to boost sales – a strategy we described in detail in our guide on indoor navigation in shopping malls.
- In corporate spaces, it could include room booking data or department layouts.
- In logistics, it might visualize restricted zones or live equipment areas.
Customization isn’t a map type, it’s a choice to design with purpose.
How to make your indoor map live
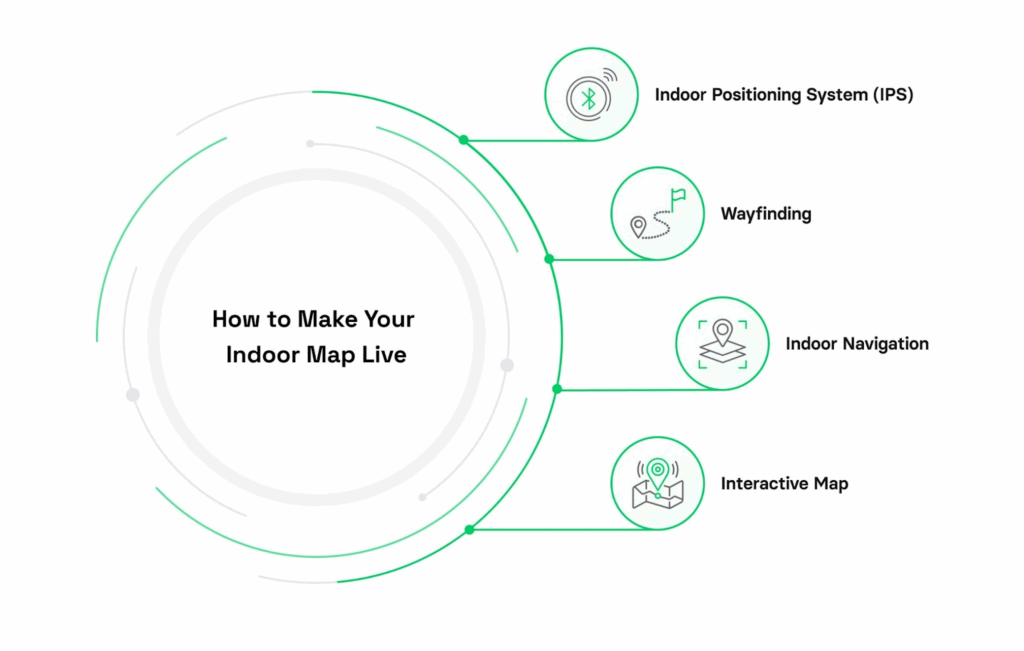
While this article focuses on creating an indoor map, let’s briefly cover what transforms a static layout into a living, responsive system.
Modern indoor environments demand more than floor plans. You need to inform, guide, and adapt in real time. These are the foundational capabilities that bring your map to life and significantly enhance the visitor experience.
1. Indoor Positioning System (IPS)
IPS is like GPS, but built for complex indoor spaces. IPS determines real-time location using BLE beacons, UWB, Wi-Fi RTT, or visual markers – forming the core of most live indoor experiences.
- What it does: Enables real-time user and asset positioning.
- Best used when: Precise location tracking is critical to user experience or operations.
Read more: How to build an indoor positioning system
2. Wayfinding
Simple, effective routing – no live tracking required. This is about generating a static path from Point A to Point B based on the map’s layout logic.
- What it does: Guides users through a space to the desired destination without relying on live positioning.
- Best used when: You want directional help, but IPS isn’t needed.
3. Indoor navigation
This is live, adaptive routing. Powered by IPS, it shows your real-time position, recalculates directions as you move, and adjusts for closed routes or dynamic conditions and can surface space utilization data.
- What it does: Provides turn-by-turn, context-aware navigation – like Google Maps, but indoors.
- Best used when: The environment is complex, and real-time guidance matters.
Read more: How to develop an indoor navigation app
4. Interactive map
Tap, zoom, and explore. These maps offer intuitive UI to engage with Points of Interest (POIs), floor information, filters, and more. It’s not about movement, it’s about clarity.
- What it does: Enables exploration and self-guided understanding of a space.
- Best used when: You want users to access details, not directions.
Together, these capabilities elevate your map from a static reference to functional infrastructure.
But to bring any of it to life – you first need a map. Let’s break down the process step by step. From floor plan acquisition to final deployment, here are 8 essential steps to create an indoor map that’s not just beautiful, but built for purpose.
How to create an indoor map: step-by-step process
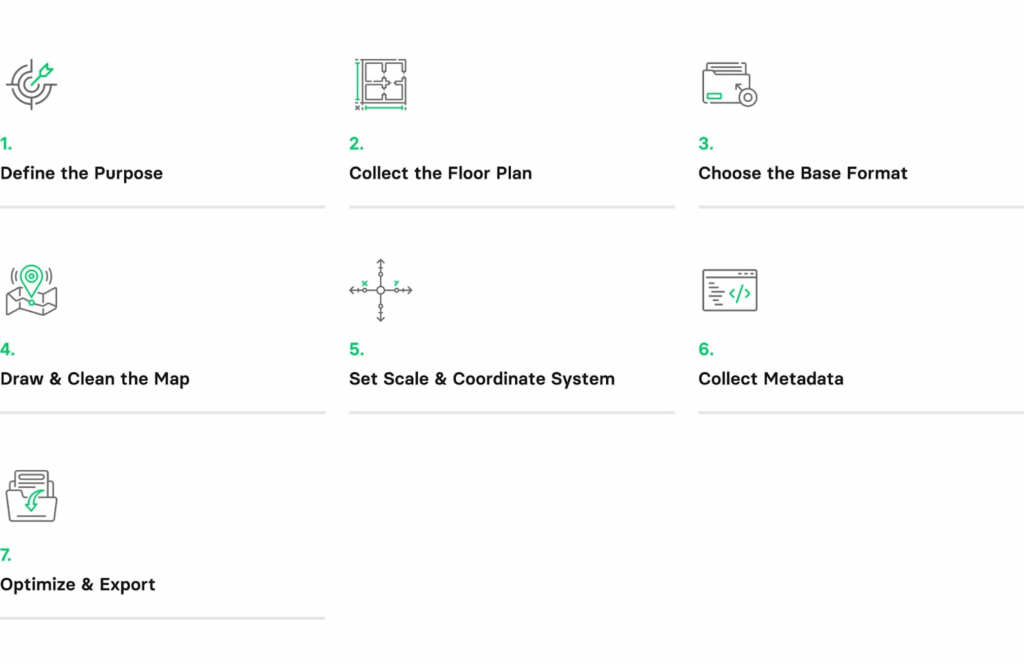
Whether you’re mapping a single-floor café or a multi-level hospital, the process of creating an indoor map follows a similar flow – from static layout to scalable digital infrastructure. Here’s how to get it right the first time.
Step 1: Define the purpose
Don’t start mapping until you answer this: what’s the purpose of this indoor map, and how will it be used?
This step determines your scope, format, structure, and effort. Skipping it means wasting time later – redrawing layers, adding missing floors, or refactoring the entire logic.
Answer these questions upfront:
- Who will use the map – visitors, employees, cleaners, security staff?
- Where will it be shown – touchscreen kiosk, mobile app, AR headset, web portal?
- What features are needed – basic layout, floor switching, searchable POIs, wayfinding, real-time positioning?
- How detailed should it be – walls only, or include rooms, desks, toilets, elevators, fire exits, etc.?
- How many floors and layers – is this one floor, a multi-story facility, or a campus with multiple buildings? Do you need overlays like cleaning zones, security checkpoints, or accessibility routes?
Teams that clearly define the scope from day one save weeks of revisions. The clearer your answers, the faster you’ll deliver – with fewer errors and lower cost.
Step 2: Collect the floor plan
Before you can build an accurate indoor map, you need a floor plan – ideally accurate, to scale, and digitally editable.
There are two main paths: 2D and 3D floor plans. Choose based on your use case (visualization, navigation, AR), and don’t forget to plan for multiple floors if your building has them.
Collecting a 2D floor plan
Most indoor navigation systems start with 2D layouts – lightweight, editable, and easy to integrate with Indoor Positioning.
If you already have one:
- Accepted formats: .pdf, .svg, .dxf, .dwg, .png, or scanned paper.
- Clean it up using Illustrator, Figma, or AutoCAD:
- Remove non-essential layers (e.g. HVAC, electrical).
- Keep only: walls, rooms, stairs, elevators, corridors.
- Align everything to scale.
- Use separate layers/files per floor.
If you don’t have one:
| Method | Tools | Use case |
|---|---|---|
Manual sketching | Figma, Illustrator | Small spaces, quick prototyping |
LiDAR scans | iPhone/iPad Pro, Canvas, Polycam | Accurate layout capture |
Photogrammetry | MagicPlan, RoomScan Pro | From photos to 2D plans |
Measure & draw | Laser distance + vector tools | High accuracy in complex spaces |
Multi-floor support: Treat each floor as a separate map layer.
You’ll need to align them vertically (e.g. via stair/elevator coordinates) to support efficient navigation.
Collecting a 3D floor plan
3D is especially useful when you need to visualize space volume, asset layout, or support augmented reality features.
| Method | Tools | Output |
|---|---|---|
3D LiDAR scanning | Matterport, Cupix, iOS LiDAR apps | Full 3D mesh + 2D exports |
Photogrammetry + modeling | DroneDeploy, RealityCapture, Blender | 3D model + plan projection |
Manual 3D modeling | SketchUp, Revit, ArchiCAD | Editable building geometry |
For multi-floor buildings, most 3D tools handle floor separation and elevation natively.
You can extract 2D floor slices or manage full 3D transitions across levels.
Step 3: Choose the base format
Once your floor plan is ready, it’s time to decide which base file format to use. This choice will directly impact how easily you can edit the map, integrate it into your app, and scale the solution in the future – especially if you plan to create interactive indoor map.
Common base formats:
| Format | Best for | Pros | Considerations |
|---|---|---|---|
SVG | Most 2D indoor maps (web, mobile) | Lightweight, scalable, perfect for interactive indoor map | Ideal for most indoor mapping use cases |
GLTF / GLB / OBJ / SCN | 3D indoor map (warehouses, AR, VR) | 3D-ready, supports animation & textures | Requires 3D modeling and more rendering power |
GeoJSON | GIS workflows, large facilities | Geospatial queries, SDK compatibility | Adds complexity; best for hybrid or large systems |
Static display or printing | Easy sharing and exporting | Not interactive or easily editable |
Which format should you choose if you want interactivity for your 2D map
When SVG Is Enough
If you’re working with a single building or floor and want full control over the UI, SVG is often the best choice:
- Vector-based and lightweight.
- Editable in tools like Figma, Illustrator, or programmatically.
- Define rooms or POIs using <path> or <polygon> tags.
- Attach metadata with id or data-* attributes.
- Add interactivity (clicks, hovers, tooltips) via JavaScript.
- Scale to real-world dimensions (e.g. 1px = 10cm) – so that IPS works out of the box.
And yes – IPS works perfectly with SVG, as long as your coordinate system is properly scaled and aligned.
When to choose GeoJSON
GeoJSON is your go-to if:
- You’re integrating indoor + outdoor navigation.
- You want to run spatial queries (e.g. rooms within 50m of an exit).
- You’re using mapping SDKs like Mapbox or Leaflet.
- You’re building maps inside buildings with many floors or campuses.
- You need compatibility with GIS tools (e.g. QGIS, ArcGIS).
At Volpis, for 90% of indoor mapping projects, we start with SVG – it’s fast, flexible, and gives full indoor map design control. We only move to GeoJSON when the project demands it (scale, spatial queries, or outdoor integration).
Step 4: Draw & clean the map
Now that you’ve chosen your base format (SVG, GeoJSON, or 3D), it’s time to create a clear, usable map. Whether you’re importing an existing layout or drawing it from scratch – your goal is a clean structure that’s easy to edit, connect, and build on.

“An accurate floor plan is crucial for reliable live navigation. Even minor misalignments can significantly disrupt the user experience.”
– Yurii, iOS Developer
If you have a floor plan:
- Import it into tools like Figma, Illustrator, or AutoCAD.
- Trace the key elements:
- Walls: lines or paths.
- Rooms: polygons or grouped shapes.
- POIs: icons or simple shapes (exits, elevators, toilets).
- Remove unnecessary details like HVAC or annotations.
- Use layers or groups (e.g. walls, doors, floor-1, etc.) to keep things organized.
If you’re working with 3D models:
- Open the model.
- Simplify geometry – remove extra elements, clean up edges.
- Group objects logically (walls, floors, stairs).
- Align the model to a consistent coordinate system.
Volpis clean map checklist
| Tip / standard | Why it matters |
|---|---|
Snap to grid | Avoids misalignment and ensures IPS accuracy |
Consistent naming conventions | Makes metadata mapping and navigation logic easier |
Separate layers by floor and type | Enables flexible control, multi-floor logic, and zoom levels |
Avoid overlapping shapes | Prevents broken interactions or rendering glitches |
Use closed shapes for rooms | Required for area detection and routing |
Limit file size and complexity | Improves loading time and performance |
Check alignment across floors | Important for vertical navigation and indoor positioning |
Tools we recommend
| Format | Tools | Best use case |
|---|---|---|
SVG | Figma, Illustrator | Lightweight, interactive 2D maps |
CAD | AutoCAD, SketchUp | Source from architects or scanned floor plans |
3D | Blender, Revit | Complex indoor spaces, reconstruction work |
Step 5: Set scale & coordinate system
Once you’ve cleaned or created your floor plan, you need to make it real. That means aligning the map to a coordinate system and defining the real-world scale – so features like Indoor Positioning, wayfinding, and multi-floor navigation actually work.
Set the scale
Your indoor map shouldn’t be “just a picture.” It needs to behave like a physical space – with dimensions you can trust.
Why it matters:
- Indoor Positioning Accuracy: Without a defined scale, your IPS (e.g., BLE, UWB, Wi-Fi) won’t be able to place users precisely on the map.
- Wayfinding Logic: Route calculations require accurate distances – otherwise, your app may suggest awkward or inefficient paths.
- Spatial Intelligence: Features like area-based access control, crowd density, or occupancy analytics rely on consistent spatial units.
How to define the scale:
Pick a simple ratio that maps drawing units to real-world units. Common options:
| Format | Suggested rule | Notes |
|---|---|---|
SVG | 1px = 10 cm | Simple to implement; sufficient for most cases |
CAD/Vector | 1 unit = 1 meter | Common in .dwg, .dxf formats |
GeoJSON | Real-world meters | Depends on projection system used |
Choose a coordinate system
Once scale is defined, you need to choose how your coordinates behave. This affects how the map integrates with other systems – or stands alone.
Option 1: Local coordinate system (best for most indoor apps)
- Definition: A self-contained X/Y grid where (0,0) is placed arbitrarily – often top-left or bottom-left of the floor plan.
- Usage: You define your own axis, scale, and units.
- Benefits:
- Lightweight and fast.
- No projection distortion.
- Easy to render in custom engines (e.g., Canvas, SVG, WebGL).
Ideal when:
- You’re building a standalone indoor navigation or visualization app.
- The map doesn’t need to align with outdoor maps or GPS.
- You want maximum flexibility in UI control.
Option 2: Real-world coordinates (when integration matters)
- Definition: Coordinates are based on geographic systems like WGS 84 (lat/lng) or a projected CRS like EPSG:3857.
- Benefits:
- Enables overlaying your indoor maps on Google Maps, Mapbox, HERE.
- Supports geospatial queries and analytics.
- Ensures compatibility with GIS tools.
Ideal when:
- You’re combining indoor + outdoor navigation.
- Your app visualizes building positions on satellite imagery.
- You want your indoor map to align with OpenStreetMap data.
- You’re managing multi-building or campus-wide spaces.
How to align with real-world coordinates
If you choose real-world coordinates, you’ll need to go beyond scaling – and also apply translation and rotation to match your building’s position on Earth.
Step-by-step alignment:
- Identify anchor points: Pick 2–3 known points on your map (e.g., building corners) and collect their GPS coordinates using tools like Google Maps or field measurement.
- Translate: Shift your local coordinate system so one of your anchor points matches its real-world location.
- Scale: Adjust your map to ensure distances between anchor points match their GPS-calculated distance.
- Rotate: If the building is not perfectly north-up, rotate your floor plan to align with real-world orientation. Most IPS systems assume north-up for consistency.
Tools that help:
- QGIS: Open-source GIS tool for precise alignment and coordinate system conversions.
- Mapbox Studio: Supports uploading floor plans and aligning them visually.
- Custom scripts: For SVG, you can write a JS function that handles scale and translation via transformation matrices.
Step 6: Collect metadata to make your map smart and usable
A floor plan without metadata is just a drawing. Metadata turns your shapes into intelligent, functional mapping data – searchable, clickable, and ready for real logic like routing, filtering, and role-based access.
Whether you’re using SVG, GeoJSON, or a 3D format, this step makes the difference between a static layout and a real product.
What to add
Think of metadata as labels and logic. Here’s a checklist of what we usually include at Volpis:
| Type | Description | Example |
|---|---|---|
Name | Human-readable label | “Conference Room A” |
Type | Functional category | “room”, “toilet”, “elevator” |
ID | Unique identifier | “room_312” |
Level | Floor number or name | “2” or “Mezzanine” |
Access | Who can enter | “staff_only”, “public” |
Group | Logical grouping | “meeting_rooms” |
Status (optional) | Real-time info | “occupied”, “available” |
Location (optional) | For aligning with real-world coordinates | “latitude”, “longitude” |
Navigation hint (optional) | Custom routing logic | “avoid_if_busy”: true |
How to add metadata (by format)
1. SVG
- Add id, class, or data-* attributes to <path>, <polygon>, etc.
- Use JavaScript to load and bind extra metadata if needed.
- Simple, fast, ideal for small to mid-size maps.
Example:
<polygon id="room_312" data-name="Conference Room A" data-type="room" />
2. GeoJSON
- Store metadata in the properties field of each Feature.
- Supports spatial queries, advanced logic, SDK integrations.
Example:
{
  "type": "Feature",
  "geometry": { ... },
  "properties": {
    "id": "room_312",
    "name": "Conference Room A",
    "type": "room",
    "access": "public",
    "level": 2
  }
}
3. 3D (GLTF/GLB/etc.)
- Use name, extras, or extensions fields.
- Often combined with external metadata linked by ID.
- Requires more setup, but enables rich interactivity.
Doing metadata right early saves weeks of rework and unlocks powerful features like indoor search, wayfinding, and contextual UI:
- Keep it lean – too much metadata in markup slows down performance. Link complex logic via IDs.
- Always plan metadata early – it’s harder to retrofit later.
- Use consistent naming – it makes integration with routing, search, and analytics seamless.
- Define a metadata schema and stick to it across all floors and buildings.
Step 7: Optimize & export
Before handing off your indoor map to developers or plugging it into a live app, take time to clean it up. A well-optimized file reduces bugs, improves rendering speed, and makes your team’s life easier. Whether you’re working with SVG, GeoJSON, or 3D formats like glTF – apply these final tweaks:
- Remove hidden or unused layers: They slow down rendering and bloat the file.
- Simplify vector paths: Reduce point count where possible – use tools like SVGOMG or Illustrator’s Simplify Path.
- Group logical elements: E.g., all restrooms, exits, or POIs in separate layers or <g> tags.
- Flatten groups where possible: Especially when no interactivity is required – it speeds up parsing.
SVG Specific:
- Clean IDs and classes – follow clear naming patterns (e.g. room_204, exit_north).
- Convert text to paths – avoids font rendering issues.
- Minify the final SVG – use tools like SVGOMG to strip metadata and whitespace.
GeoJSON Specific:
- Reduce coordinate precision – 3–4 decimals is often enough for indoor use.
- Structure by floor or type – helps apps load and style content faster.
- Gzip the file – especially if used in web apps or APIs.
glTF/glB (3D) Optimization:
- Apply Draco compression – dramatically reduces file size.
- Remove unused materials/textures – cuts load time.
- Bake static lighting – improves AR/VR performance.
Now you can pass it to your development team to integrate into your app, SDK, or indoor navigation system.
Need help with integration, IPS setup, or interactive features? Talk to Volpis – we help companies turn static maps into fully working indoor navigation apps.
Common mistakes in indoor location mapping and how to avoid them

Over the years, we’ve worked on indoor maps in many different formats, creating them from scratch, adapting raw architectural drawings, and improving existing maps for production use in real-world applications.
That hands-on experience has shown us one thing clearly: it’s easy to overlook critical details that only become painful later – during implementation, testing, or scaling. Below are the most frequent mistakes we’ve seen (and fixed), and what we now always recommend avoiding from the start.
1. Treating the map as static
What goes wrong: Teams assume the floor plan will remain unchanged – so they hardcode POIs or draw walls directly into the base layer.
Why it matters: Real-world environments are dynamic. Rooms change functions, walls are added, and furniture layouts evolve. A static design quickly becomes outdated.
What to do instead: Structure your map to support digital transformation. Use layers, structured metadata, or external POI files. In high-change environments, consider a CMS or admin panel to update the map easily.
2. Ignoring accessibility and compliance
What goes wrong: Maps are built without marking ramps, elevators, or accessible paths – or these are added too late in the process.
Why it matters: You risk excluding part of your user base or creating legal and ethical issues, especially in public environments like hospitals or airports.
What to do instead: Include accessibility-related features (like wide paths, elevators, and restrooms) in metadata or separate layers. Your routing logic should support alternate paths when accessibility is required.
3. Overloading the map with visual noise
What goes wrong: The map includes decorative elements like chairs, art, furniture, or unnecessary textures.
Why it matters: This slows down rendering, clutters the interface, and makes both development and maintenance harder. It also distracts from navigation and usability goals.
What to do instead: Stick to the essentials – walls, doors, paths, POIs, and other important map features. Use minimalism to improve clarity, performance, and maintainability. Decorative layers can be included separately if needed.
4. Using imprecise or incomplete floor plans
What goes wrong: The source file is outdated, lacks key dimensions, or is missing important elements like elevators or service zones.
Why it matters: Inaccurate plans result in misaligned assets, poor user experience, and failed positioning or navigation – especially in large buildings.
What to do instead: Validate the source before building the map. If needed, do a quick on-site survey or request updated drawings. Cross-check critical dimensions before finalizing geometry.
Our experience in custom indoor mapping and navigation solutions
At Volpis, we handle indoor solutions end-to-end – from creating indoor maps, to implementing indoor mapping systems, positioning systems, and building full-scale indoor navigation platforms. Over the years, we’ve delivered projects across industries such as retail, hospitality, transportation, and logistics.
Our biggest project – under NDA – is a warehouse mapping and navigation tool integrated with a warehouse management system. It’s used by a major enterprise in logistics and manufacturing and isn’t public, but reflects the kind of complex, enterprise-grade systems we build.
We also partnered with Purple AI, a global leader in indoor wayfinding and Wi-Fi analytics. We supported their team with SDK development for their indoor navigation system and built a mobile app for Wi-Fi crowdsourcing, enabling accurate “blue dot” positioning. Their CEO, Gavin Wheeldon, left a positive feedback in a Clutch review.

As an example of creating a digital map, take a look at Seaport Marina – a web platform for managing berth reservations and slope operations. We built a lightweight, SVG-based map and integrated it into the marina’s operations. The client also shared a Clutch review highlighting our work. Read more about this project in the Seaport Marina case study.

Regularly ranked among the Top Custom Software Development Companies on Clutch, we know how to take complex spaces and turn them into usable, scalable, and future-proof indoor solutions.
If you’re exploring indoor mapping for your business – contact Volpis today via info@volpis.com
FAQs
What if I don’t have digital floor plans?
No problem. You can digitize building’s floor plans using several methods. LiDAR-equipped devices (e.g., iPad Pro) can scan spaces and create precise 3D layouts. Tools like MagicPlan or RoomScan Pro convert photos into editable floor plans. Alternatively, a designer can manually draw layouts in Figma, Sketch, or Illustrator using a sketch or photo as a base. Once digitized, export your floor plan to SVG or GeoJSON to be used in interactive maps, wayfinding systems, or admin panels.
What’s the best free indoor mapping software?
Start with Mappedin Maker – it lets you upload a PDF or image of your floor plan and turn it into a simple interactive map you can view in the browser. No coding needed. If you need more control, use QGIS to clean architectural drawings (DWG, DXF, SVG) and export them as GeoJSON or SVG. You can then display the map using free JavaScript libraries like Leaflet or OpenLayers – perfect for embedding in web or mobile apps.
What’s the best format for an editable map?
SVG is the most flexible choice for 2D editable maps. It supports scalable vector graphics that can be easily styled, edited, and integrated into web or mobile apps. Layers and objects can be tagged for interactivity, such as room names or POIs. If your use case involves spatial queries, GIS workflows, or integration with mapping engines like Mapbox, Leaflet, or QGIS, GeoJSON is more suitable. Ideally, you should use both formats: SVG for visual design and GeoJSON for geodata logic.
How long does it take to create an indoor map?
A basic map with clear floor plans and limited POIs can take 1–2 weeks. However, complex projects with multiple floors, interactive zones, indoor positioning, or backend integrations often take 4–8+ weeks. Timelines depend heavily on the availability and quality of existing floor plans, the precision needed, and the tech stack. Efficient planning, reusable components, and good tools can significantly reduce time and cost for updates, future scaling, and system integration.
What skill sets or team roles are needed for an indoor mapping project?
You’ll need a designer to prepare clean floor plans, developers with GIS or indoor mapping expertise to build the app and manage data, and a facility or operations lead to validate the layout. This setup works well for most interactive maps with POIs, floor switching, and wayfinding features.
How to keep indoor maps updated as the spaces change?
Treat your indoor map as a living system, not a one-time asset. In airports, gates may close or corridors get blocked. In offices or malls, rooms change functions, or new POIs appear. To keep your map accurate, schedule regular map updates and be ready to update existing floor plans whenever layout changes occur. Assign a person (e.g., facility manager) to track any layout changes. Use an admin panel or CMS to update rooms, POIs, or closures – no dev help needed.
Can I build one map for both web and mobile?
Yes. If your map is built with scalable formats like SVG or tiles and uses a shared data layer, you can serve the same map to web apps, native mobile apps, and even kiosks. Design responsiveness and performance optimization are key. Maintain separate UI layers if needed, but keep logic, metadata, and layout reusable. This not only simplifies maintenance but also ensures a consistent experience for users across devices and platforms, reducing the cost of supporting multiple versions.
Can indoor maps be monetized?
Yes, indoor maps can open up new revenue streams. In malls, airports, hospitals, and campuses, you can monetize maps by offering promoted POIs, branded wayfinding routes, or geo-targeted ads to tenants or third parties. For example, shops can pay to appear at the top of search results or get highlighted on the route. You can also provide access to visitor analytics, such as foot traffic and dwell time near zones, helping tenants optimize operations and marketing campaigns.
Can I use indoor maps offline?
Yes. You can fully support offline use by bundling all map assets (SVGs, tiles, GeoJSON, POI metadata) directly into your app or device. This is essential for high-traffic or poor-connectivity environments like airports, stadiums, warehouses, and remote campuses. Offline maps allow users to search, navigate, and access layers even without internet. Just ensure routing logic, language support, and all visual elements are preloaded or cached to maintain performance and reliability.
Can I build one map for both web and mobile?
Yes. If your map is built with scalable formats like SVG or tiles and uses a shared data layer, you can serve the same map to web apps, native mobile apps, and even kiosks. Design responsiveness and performance optimization are key. Maintain separate UI layers if needed, but keep logic, metadata, and layout reusable. This not only simplifies maintenance but also ensures a consistent experience for users across devices and platforms, reducing the cost of supporting multiple versions.